Transform Your Space with Professional Window Installation

Windows are more than just openings in a wall; they shape the look, feel, and efficiency of a building. A well-planned window installation enhances natural light, improves ventilation, and can dramatically boost the overall appearance of a home or office. Whether you’re renovating, building new, or upgrading old fixtures, understanding the process and benefits of proper window installation can help you make smarter decisions for your space.

window installation

Why Quality Window Installation Matters

Windows are integral to the comfort and energy performance of a property. Poorly installed windows can lead to drafts, water leaks, and higher utility bills. In contrast, correctly fitted windows seal your interiors from the elements, reduce noise, and provide a secure barrier. Investing in quality installation ensures that you get the full benefits of your chosen window style and materials, and that the frame and glass perform as intended for many years to come.

Planning Ahead

Every successful window installation starts with proper planning. Before any work begins, measure the existing openings accurately and consider the architectural style of the building. Think about the function of each space — living areas may benefit from large picture windows, while bathrooms may require smaller, frosted options for privacy.

Another crucial step is determining your budget. This will guide your choice of materials and styles, from simple single-hung designs to complex bay or casement windows. Preparing ahead also means checking that all tools and materials are ready so installation can proceed smoothly and without delays.

Choosing the Right Windows

Selecting the appropriate type of window is just as important as installing it correctly. Different designs serve different purposes. Sliding windows save space and are easy to operate, while double-hung styles allow for flexible ventilation. Larger windows bring in more daylight, which can make rooms feel bigger and more inviting.

Material choices also influence durability and maintenance. For example, frames made from sturdy composites or treated wood offer aesthetic appeal and longevity, while other materials may emphasize affordability or insulation. Consider your local climate, the direction your windows face, and the overall energy efficiency you’re aiming for when making your choice.

Preparing the Opening

A proper fit starts with a clean, level, and correctly sized opening. Before placing the new window, remove any old caulking, debris, or damaged materials around the frame. This prevents future issues with sealing or alignment. Make sure the sill is level and the sides are plumb, as even slight deviations can cause operational problems later.

If you’re replacing old windows, inspect the surrounding structure for damage or rot. Addressing these issues first helps ensure that your new window sits securely and performs well over time.

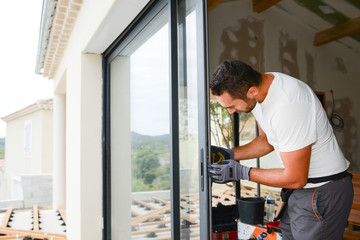
The Installation Process

Once the opening is prepared, it’s time to set the new window. Typically, this involves carefully placing the window into the opening, checking that it’s level, plumb, and square, and then securing it with the appropriate fasteners. Shims may be used to make fine adjustments and ensure a snug fit.

After the window is anchored, apply flashing tape or other waterproofing materials around the edges. This prevents water infiltration, one of the most common problems with poorly installed windows. Then, seal the perimeter with high-quality caulk to create an airtight and watertight barrier.

Insulation and Sealing

Even the best window can underperform if gaps are left unsealed. Once the unit is secured, fill any small spaces between the frame and the wall with insulation designed for windows and doors. This helps minimize drafts and maintain indoor temperatures.

Pay close attention to the interior trim as well. Properly fitted trim not only looks neat but also protects the edges of the window opening from wear and tear.

Safety and Precision

Window installation may seem straightforward, but it requires precision and adherence to safety guidelines. Windows can be heavy and awkward to handle, so using the right equipment and enlisting assistance for large units is essential. Taking precautions to prevent falls or injuries when working at heights also protects both the installer and the property.

Finishing Touches

The last step involves installing interior and exterior trim, painting or staining as needed, and ensuring the window opens, closes, and locks smoothly. Clean the glass and frame to remove any construction debris. A final inspection ensures there are no gaps, leaks, or alignment issues. These finishing touches not only complete the look but also verify that the installation will stand the test of time.

Long-Term Maintenance

Proper installation sets the stage for years of reliable performance, but regular maintenance keeps windows in top shape. Clean the glass and frames periodically to prevent the buildup of dirt or mold. Check seals and caulking annually and reapply if necessary. Lubricate moving parts to maintain smooth operation.

By keeping up with simple maintenance, you extend the life of your windows, preserve their efficiency, and maintain your property’s curb appeal.

The Benefits of Professional Installation

While some homeowners may be tempted to install windows themselves, professional installation offers significant advantages. Experienced installers bring specialized knowledge, ensuring that measurements are exact and materials are handled correctly. They’re also familiar with building codes and best practices, which reduces the risk of costly mistakes.

In many cases, professional installation may also include warranties on labor, providing peace of mind if any issues arise later. For those who value time, safety, and long-term performance, entrusting the job to experts can be a smart investment.

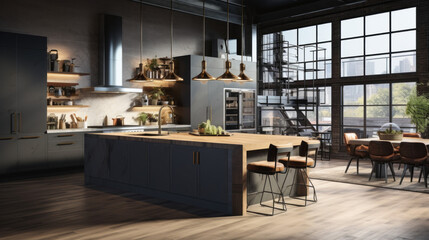
Enhancing Your Space

Windows play a major role in how your home or office feels. They frame your view of the outside world, regulate natural light, and contribute to energy efficiency. By carefully planning, selecting quality materials, and ensuring correct installation, you can transform your space both visually and functionally.

Whether you’re replacing outdated models or adding new ones to a renovation, each properly installed window adds value, comfort, and beauty to your property. With the right approach, window installation becomes not just a technical task but a way to elevate your living or working environment.

The Best Paint Types for Cabinet Painting

Cabinet Painting Sacramento

Painting cabinets is a big project, but one that can drastically change the look of a kitchen. Choosing Cabinet Painting Sacramento is essential to ensure the quality of your finished product.

In addition to stain resistance, you’ll want a paint with a sheen that’s durable enough to hold up to everyday use and cleaning. My blind tests showed that Benjamin Moore Advance is the best cabinet paint for durability and sheen options.

Water-Based

When it comes to updating your cabinet paint, choosing the right type of paint is essential for a smooth, professional-looking finish. Whether you prefer the quick drying and low odor of water-based options, the durability of oil-based paints or the eco-friendliness of hybrid cabinet paints, there’s a formula that’s perfect for your project. Using the right paint for your cabinets helps you achieve a durable, long-lasting finish that holds up to everyday kitchen use and resists moisture damage—including mildew growth, cracking, peeling, or bubbling.

Water-based paints have traditionally been known to lack the durability of oil-based formulas, but recent advancements in resin technology mean that today’s water-based paints offer comparable hardness and scuff resistance, making them a great choice for high-traffic areas like your kitchen or bathroom. Additionally, water-based cabinet paints typically dry within an hour and provide easy cleanup with soap and water.

One of the most popular water-based cabinet paints is Benjamin Moore Advance, which offers a superior leveling for a smooth finish and can be purchased in an array of sheens. Other popular water-based options include Sherwin-Williams Emerald Urethane and Behr Urethane Alkyd Enamel.

In addition to a smooth finish, the sheen you choose plays an important role in determining how easy your cabinet paint is to clean. A matte finish hides grease smudges and fingerprints well, while satin provides a subtle sheen with additional durability. Semi-gloss is another common option for cabinet paint that offers a beautiful shine while still being easily cleaned.

Regardless of the sheen you choose, be sure to follow the proper application instructions for your specific cabinet paint. A few common application mistakes—including applying too thick of an initial coat, rushing the process, and not using a foam roller for best results—can lead to orange peel texture or visible brush strokes that detract from your finished look.

It’s also crucial to remember that even after your cabinet paint feels dry, it must cure completely before the protective surface is fully activated. This requires 21-30 days, so don’t rush this step or risk ruining your hard-earned result!

Oil-Based

Painting your cabinets is a great way to update your kitchen and make a huge difference in the look and feel of the room. The key to a successful cabinet painting project is choosing the right paint and following proper application techniques. If you do, your cabinets will have a professional finish that stands up to everyday wear and tear for years to come.

Oil-based cabinet paints are known for their durability and ability to resist moisture, stains, and dirt. They are a good choice for homeowners who prioritize long-term durability over ease of use and cleanup. However, there are a few drawbacks to using this type of paint. Slow Drying: Oil-based paints take up to 24 hours to dry, which can lengthen your cabinet painting timeline. Odor: They emit a strong, pungent odor that requires adequate ventilation during the painting process. Laborious Cleanup: You’ll need mineral spirits or paint thinner for cleanup. Environmental Impact: They contain high levels of VOCs, which can be harmful to the environment.

Water-based paints are a popular choice for many cabinet painting projects. They can be used on any surface, including laminate and vinyl. They dry much faster than oil-based paints, which makes them a more suitable choice for homeowners who want to complete the project in a shorter amount of time. They also emit less VOCs than oil-based paints, making them a safer option for indoor use.

If you’re not comfortable using a water-based paint, acrylic latex is a durable alternative that dries in just a few hours. It can be used on wood surfaces and has a smooth, glossy finish that resists chipping and peeling. It is available in both oil- and water-based versions, with the latter being more eco-friendly and less toxic.

Chalk paint is a water-based paint with a matte, chalky texture that offers a unique and rustic look. It is easy to apply and can be distressed for a more aged look. It has a quick drying time and low odor, making it a good choice for projects with tight deadlines.

Hybrid alkyd enamel paints are a modern hybrid that combine the durability of oil-based paint with the ease of use and cleanup of water-based paints. Sherwin Williams Emerald Urethane Trim Enamel is one example of a high-quality, commercial-grade hybrid alkyd enamel paint that has gained popularity among professional painters and DIYers.

Acrylic & Enamel

The term “enamel” is often used to describe paints that shine. However, the term really only serves as a marketing tool, as there are many different types of enamels with varying chemistries.

Most of these paints are oil-based and solvent-based, which give them a hard, glossy finish that resists chipping and scratching. They also tend to be less expensive than acrylic paints but require more coats to provide adequate coverage. Enamel paints usually emit strong fumes and should be applied in a well-ventilated area.

If you want a durable, long-lasting finish for your cabinets, an enamel or urethane paint is the way to go. However, these types of paints are typically more difficult to apply than latex or acrylic paints. They also take a little longer to dry, which can make them impractical for projects that need to be completed quickly or over a short period of time.

A popular choice for cabinet painting is Sherwin Williams Emerald Urethane Trim Enamel. This hybrid alkyd paint applies like a water-based paint but dries to an oil-based finish, which makes it ideal for DIYers who want a tough, durable finish that cleans up well. It is available in both gloss and satin sheens, which are good choices for kitchens.

Another option for cabinets is Sherwin Williams ProClassic Semi-Gloss Acrylic Enamel. It is similar to the Sherwin Williams Emerald Urethane but has a lower sheen level and slightly different chemistry. Both paints are available in a wide range of colors and will provide a great-looking, long-lasting finish.

It is important to use a good quality primer when applying any type of paint, but especially when painting cabinets. Primer prepares the surface for the paint and helps it adhere better, last longer, and look more vibrant. It also covers imperfections and provides a smooth, even base for your final layer of paint.

When painting cabinets, it is essential to choose a high-quality paint that will withstand the Florida sun and salt water. A professional-grade paint job will protect the wood and add value to your home, making it worth the investment.

Primer

The best primers for cabinet painting will give you a smooth finish that holds up well against moisture and stains. They can also help prevent damage from scratches or other blemishes. They can be used with both water-based and oil-based topcoats, but they need to dry completely before applying a second coat. It’s recommended to lightly sand between coats with 220-grit sandpaper to avoid a milky or cloudy appearance, especially over dark colors.

You should always prime before you paint, and kitchen cabinets are no exception. Choosing a mildew-resistant product, like KILZ 3 Premium Primer, is essential to keep moisture levels and humidity in check.

Using a good quality primer will ensure that your cabinets look smooth and clean, even after the topcoats are applied. It will also promote adhesion and block stains so that your topcoats will last.

While you may be tempted to skip priming when you’re painting over a light shade, it’s critical for a beautiful and long-lasting finished project. If you skip this step, your cabinets could start peeling or chipping.

Consider contrasting shades to create a modern or rustic design. For example, pairing a muted shade like Shaved Coconut with a darker hue such as India Ink can instantly update your room. Alternatively, opt for primary colors to bring a bold, playful feel to your space. You can tone down the boldness with a neutral wall color and complementary hardware.

For a smooth, glass-like surface that will stand up to the wear and tear of a busy kitchen, consider satin or semi-gloss cabinet paint. It will still reflect some light, but it won’t show up every single smudge or finger mark.

Another option for a smooth and durable finish is a polyester-based auto primer. This type of primer is often used in the automotive industry because it has what’s known as “amazing build” – it fills in small scratches and blemishes and helps the paint bond to the surface. It’s easy to work with, sprays well and cleans up quickly. However, it can be brittle and more prone to cracking than urethane or epoxy once dry. That’s why it’s best suited for smaller touch-up projects rather than whole-body bodywork.